

Roblox offers a vibrant and creative community where players can not only enjoy a multitude of games but also express themselves through customizable avatars. One of the coolest ways to stand out in the Roblox universe is by creating your own clothing. Having a personalized Roblox shirt not only allows you to wear your unique creations but also gives you the opportunity to earn Robux by selling your designs. In this comprehensive guide, I’ll walk you through the process of clothing in roblox shirt step-by-step.
1. Introduction
Roblox is an immersive platform that encourages creativity, and one way to showcase your artistic flair is by creating unique roblox clothing for your avatar. Designing a Roblox shirt not only allows you to personalize your character but also presents an opportunity to earn virtual currency by selling your creations in the Roblox catalog.
2. Accessing the Roblox Website
Navigating to Roblox

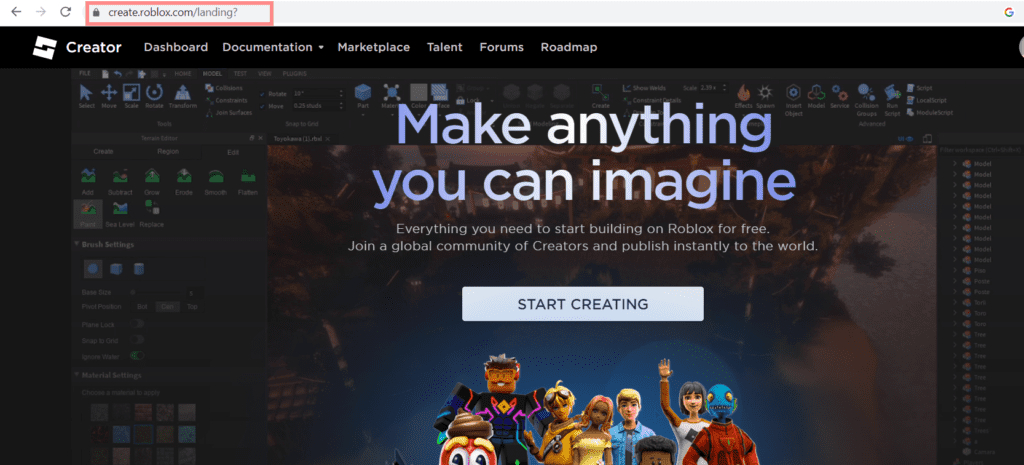
To begin the process of creating your Roblox shirt, head to the official Roblox website and click on the “Create” tab at the top. you may be redirected to slightly different pages, but the best way to access the page I am currently on is by entering ‘create.roblox.com‘ in your address bar.
Selecting the Clothing Category
Once you’re on the ‘Creator’ dashboard page, Locate the ‘Avatar items’ section, where you will find multiple options available. Choose the one that suits your preference. For now, we are going to focus on creating a shirt.
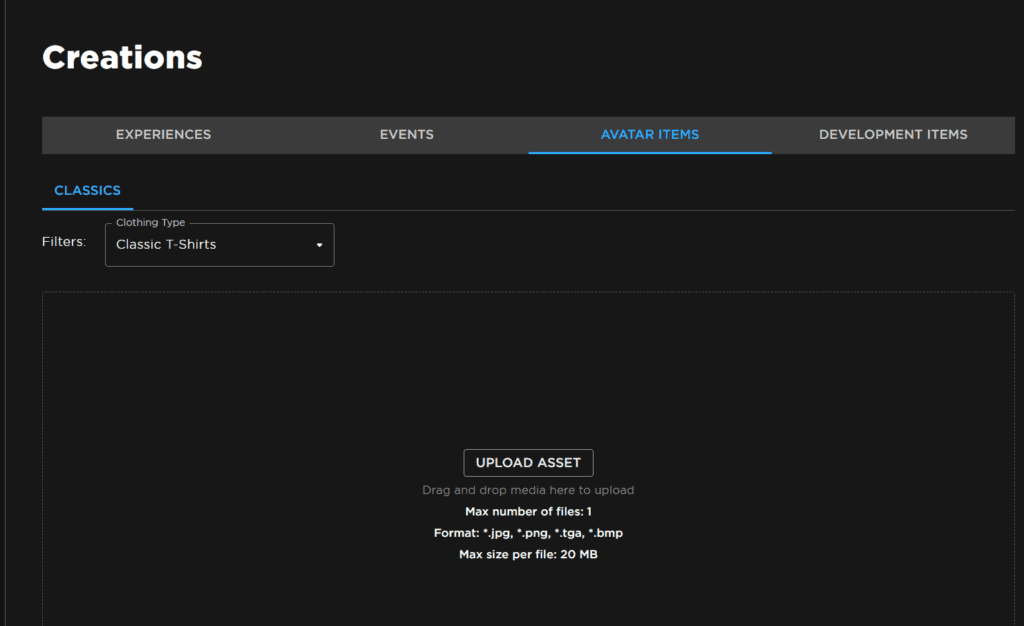
Understanding the Difference Between T-shirts and Shirts
In Roblox, “T-shirts” are simple images uploaded for the front of your character, while “Shirts” are more advanced clothing items that allow for full design customization, including hoodies and more complex clothing options.

3. Designing Your Roblox Shirt
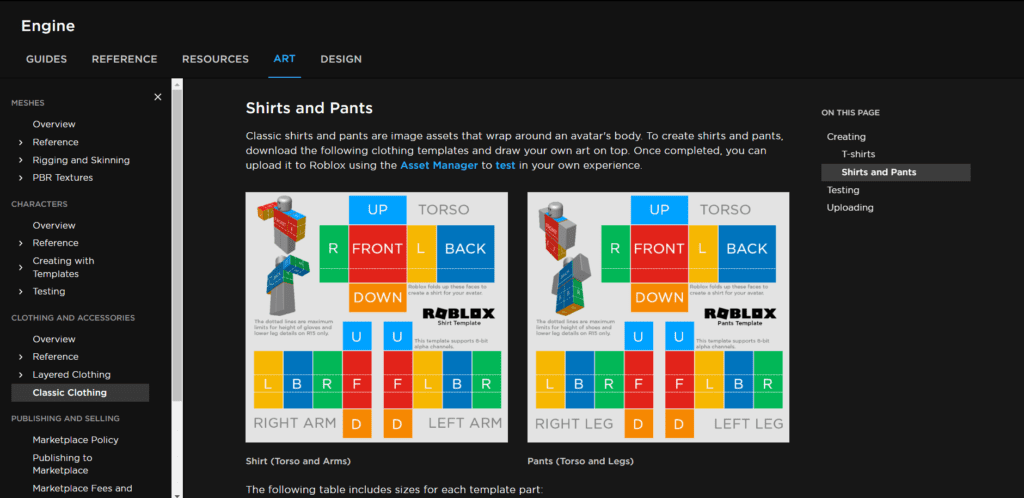
Downloading the Template
In the ‘Shirts’ section, click on ‘Upload.’ This will redirect you to another page. On that page, click on ‘Learn More’, where you can find basic templates for shirts. look for the template for shirts (usually marked with “arms”) and right-click to save the image to your computer.
Utilizing an Online Image Editing Software for Clothing in Roblox
- To begin creating your custom Roblox shirt, you need to access an online image editing software called “Photopea.” You can access Photopea by going to the website photopea.com in your web browser.
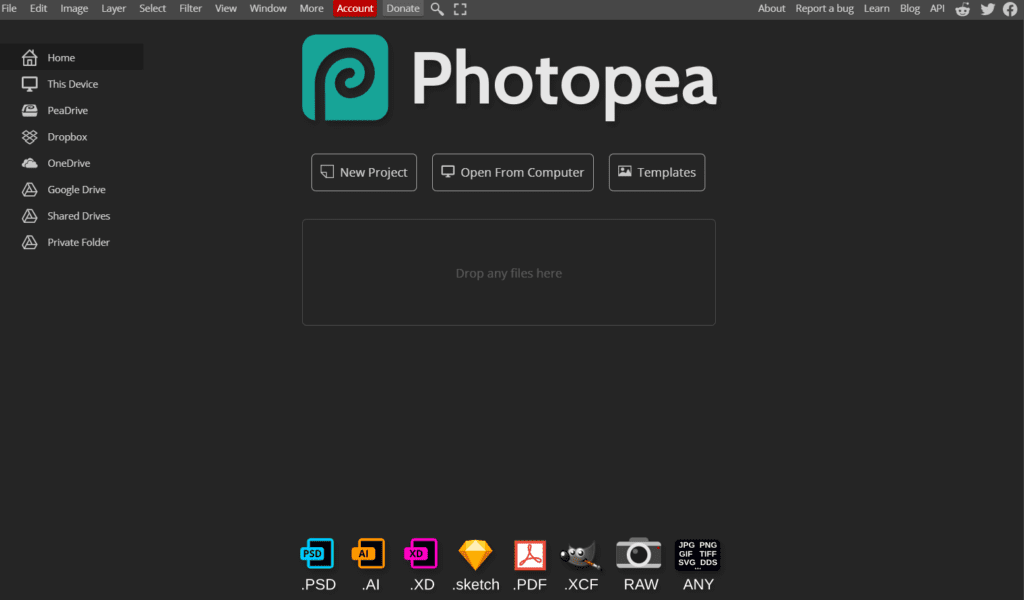
- Once you’re on the Photopea website, look for a small “x” symbol in the top right corner and click on it to close any pop-ups or ads that might appear. Then, click on “File” in the top left corner and select “Open from computer.” This will open your file explorer.
- In your file explorer, navigate to the location where you saved the shirt template you downloaded earlier. Click on the template file to select it and then click “Open.” The template will now be uploaded into the Photopea editor.
- To better view the template, you can zoom in by pressing “Ctrl” and the plus sign (+) key on your keyboard. The template might appear small, but you can enlarge it using the transform controls in Photopea.
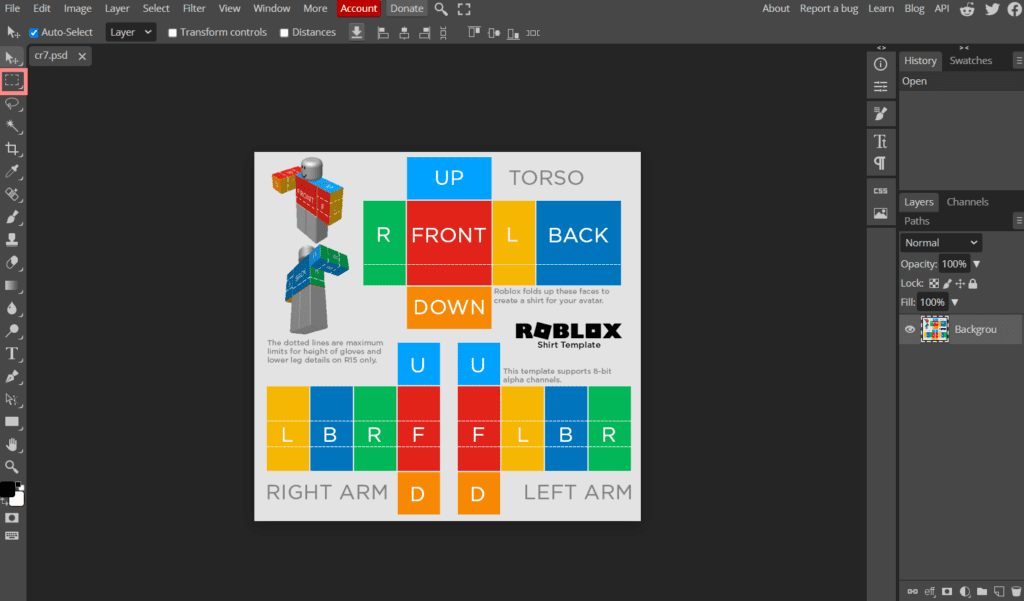
- The template includes guidelines that indicate where the different parts of the shirt will be placed on your avatar. These guidelines will help you design your shirt accurately. Your task now is to remove the existing colors on the template so you can start adding your own images and textures.

- To remove the colors, use the “Rectangle Select” tool located on the left side of the screen. Click and drag the tool to select a section of the template, then press the “Delete” key on your keyboard to delete the selected area. Repeat this process for the other sections until all the colors are removed.
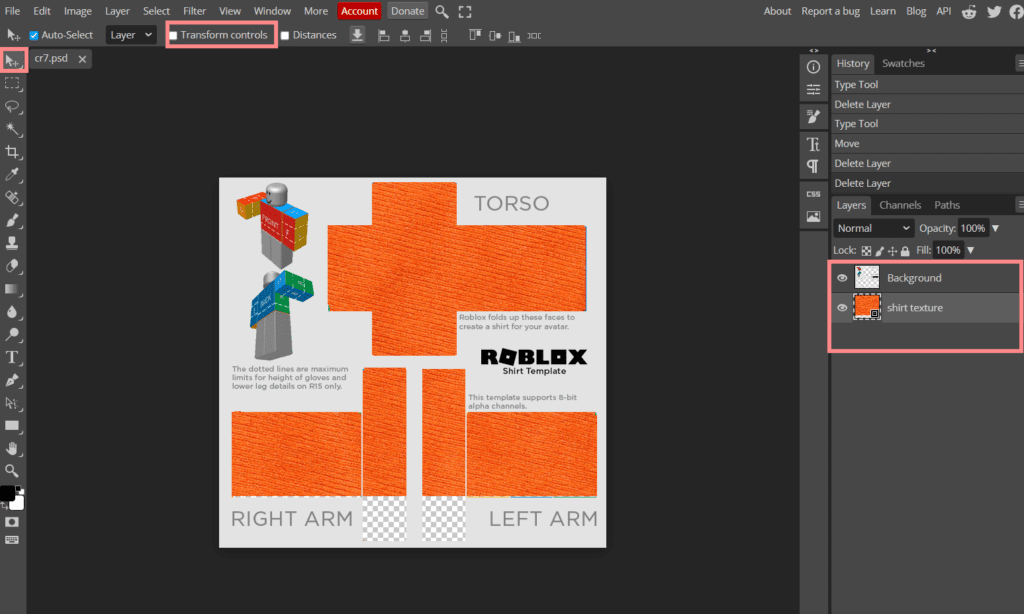
- Now that the template is ready, you can start adding textures and images to create your unique clothing design. You can search for cool textures online by using search terms like “shirt texture” in Google Images. Find a texture you like, right-click on it, and choose “Save image as” to download it to your computer. Then, go back to Photopea, click on “File” again, and select “Open from computer” to upload the texture you downloaded.
- Once the texture is uploaded, you can resize and position it within the template to create your desired shirt design. Remember to leave the areas around the hands transparent to ensure they look natural when worn on your avatar.
- Additionally, you can add images or text to further personalize your shirt. To do this click on “T” and place it where you want to add your text. You can then resize and position the text using the transform controls.
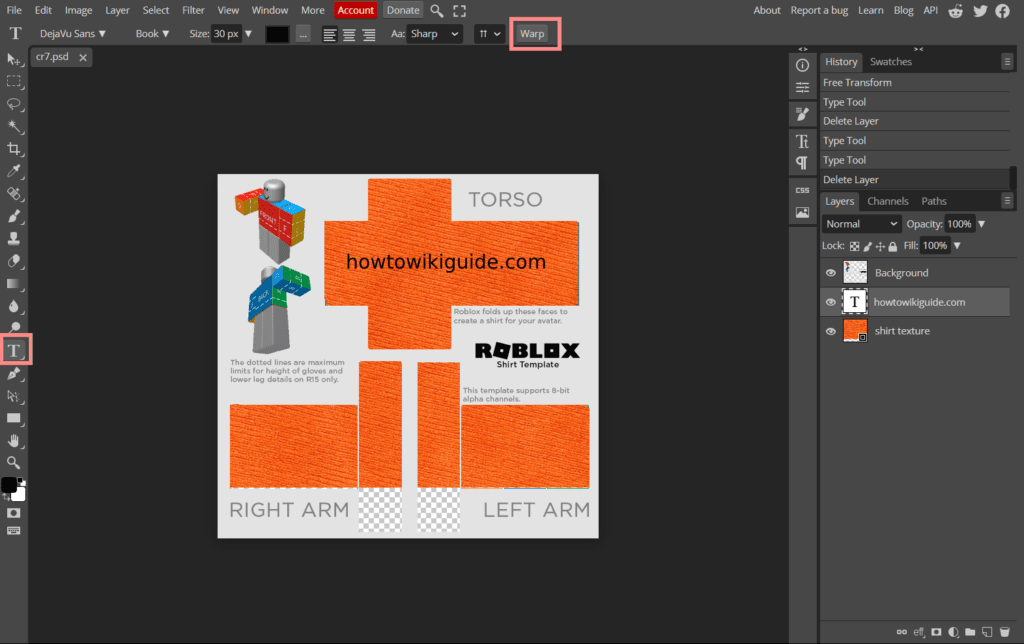
- After you’ve finished customizing your shirt, it’s time to export it as a PNG file. To do this, click on “File” in the top-left corner again and select “Export As.” Choose PNG as the file format and click “Save” to download your shirt design to your computer.
4. Uploading Your Shirt to Roblox
Uploading the Shirt to Roblox
Go back to Roblox, select “Avatar items,” and click on “Shirts.” Then, click “Upload” and choose the PNG file of your shirt design.
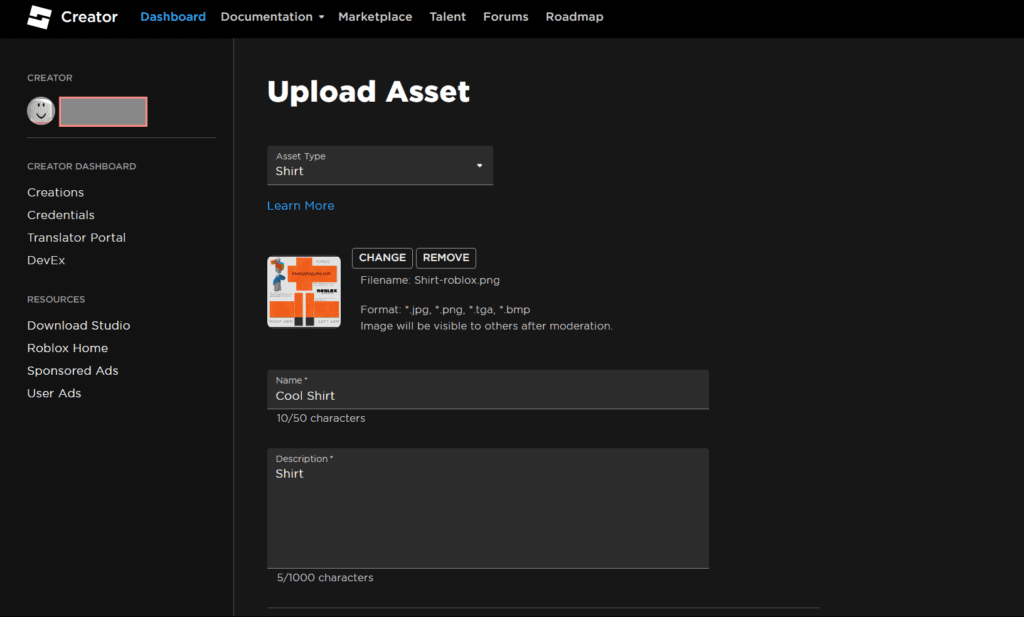
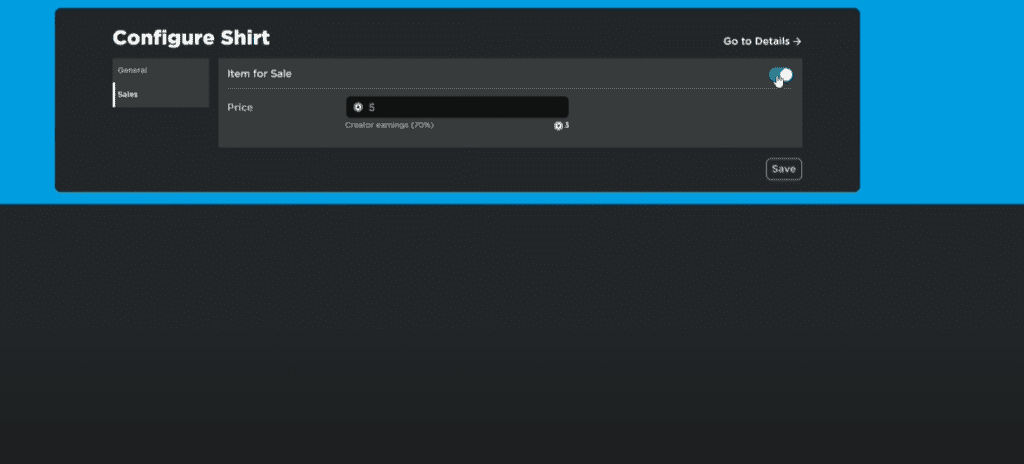
Setting a Price and Description
Name your Roblox Shirt (e.g., “Cool shirt”) and, if desired, add a description. Decide on a price for your shirt; remember that it costs 10 Robux to upload.
Putting Your Shirt on Sale
If you wish to sell your shirt, make sure it’s set to “For Sale” in the settings. Premium members can upload shirts for free.
5. Wearing and Sharing Your Roblox Shirt
Accessing Your Avatar on Roblox
To view your avatar, go to the Roblox website, click on your profile, and select “Avatar” from the dropdown menu.
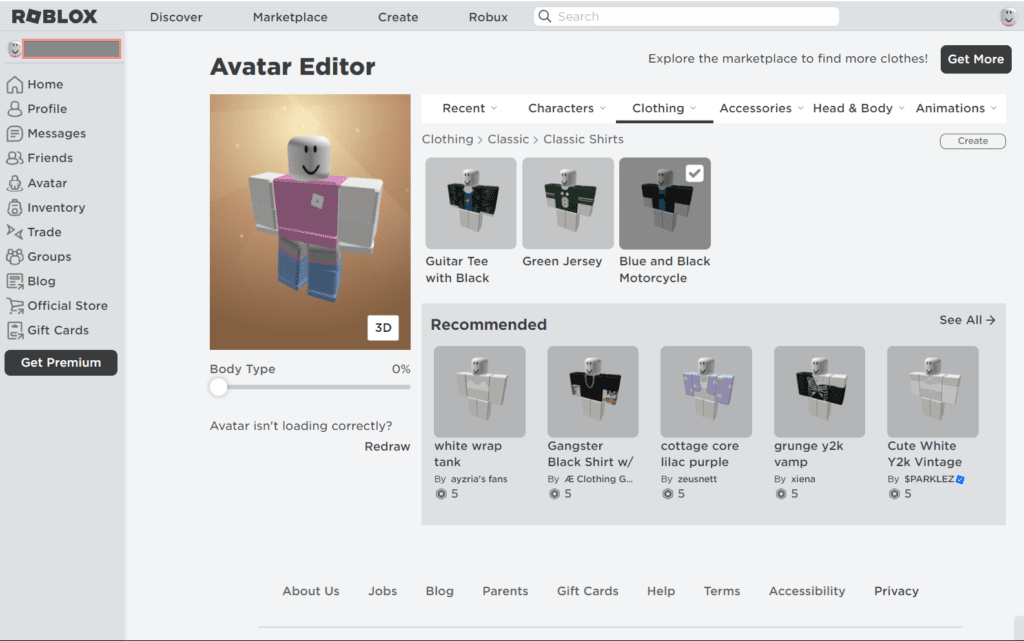
Finding and Wearing Your Custom Roblox Shirt
Under the “Clothing” section, select “Classic shirts” and find your shirt design. Click on it to wear it instantly.
Promoting Your Shirt to Earn Robux
Promote your shirt on social media, collaborate with game developers to feature your shirt in their games, and engage with the Roblox community to gain more exposure and sales.
6. FAQs
- What is the difference between T-shirts and shirts in Roblox?
- T-shirts are simple images uploaded for the front of your character, while shirts allow for more advanced customization, including hoodies and complex designs.
- Do I need a premium membership to upload shirts?
- Premium members can upload shirts for free, while non-premium members will be charged 10 Robux to upload.
- Can I sell my custom shirts on Roblox?
- Yes, you can set a price for your shirt and put it on sale to earn Robux from your creations.
- How can I promote my shirts and increase sales?
- Utilize social media platforms, collaborate with game developers, and engage with the Roblox community to gain more exposure and increase sales.
- Can I wear multiple custom shirts at the same time?
- No, you can only wear one shirt at a time on your Roblox avatar.
7. Conclusion
Creating your own Roblox shirt is a rewarding experience that allows you to express your creativity and individuality within the Roblox community. By following the steps outlined in this guide, you can design and upload your unique shirts, wear them with pride, and even earn Robux by sharing your creations with other players.


3 thoughts on “How to Make Clothing in Roblox like a Pro: Unlock Your Style”
Comments are closed.